Are you tired of the default font on your Android device? Do you want to personalize your device and make it truly your own? You’ve come to the right place. In this comprehensive guide, we will explore everything you need to know about changing the font in Android. From understanding the default font to learning how to change it using device settings, third-party apps, and even custom fonts in your own app, we’ve got you covered.
Plus, we’ll introduce you to the best fonts for Android, such as Roboto, Lato, Open Sans, Montserrat, and Noto Sans. And if you’re a developer looking to incorporate custom fonts into your Android app, we’ll walk you through the process step by step. So, if you’re ready to take control of the fonts on your Android device and add a personal touch, read on to discover the endless possibilities that await.
What Is the Default Font in Android?
The default font in Android refers to the typeface used in the system’s settings and user interface.
This default font plays a crucial role in defining the overall visual appearance of the device and influences the user experience. It significantly impacts readability, accessibility, and the device’s aesthetic appeal. With the widespread use of smartphones for various tasks, the default font in Android directly affects how users interact with the interface and consume content.
The choice of font can evoke emotions and convey information, making it an essential element in creating a cohesive and engaging user experience.
How to Change the Default Font?
Changing the default font in Android involves customizing the typeface and style used across the system’s settings and user interface.
To begin, navigate to the ‘Settings’ app on your Android device. From there, locate and tap on the ‘Display’ or ‘Accessibility’ option, depending on the specific layout of your device.
Once in the Display or Accessibility menu, look for the ‘Font’ or ‘Font Style’ section. Here, you can choose from a variety of pre-installed fonts or download new ones from the Google Play Store. Select the desired font style and confirm your choice. Your Android device will apply the new font across the system, providing a fresh look and feel to the user interface.
How to Change the Font in Android?
Modifying the font in Android allows users to customize the appearance and style of text displayed across apps, settings, and the overall user interface.
This can be achieved through several methods, such as using system settings, app-specific options, or third-party applications. In system settings, users can navigate to the display or accessibility section to find font customization options. Some Android devices offer built-in features for font changes, allowing users to select from a range of pre-installed font styles.
Alternatively, various third-party font apps are available on the Google Play Store, offering extensive libraries of fonts, styles, and customization tools to enhance the visual aesthetics of the device’s text.
Using the Device Settings
Changing the font in Android using the device settings involves accessing the system’s appearance and display options to modify the default typeface and text style.
Once you have navigated to the device’s settings, tap on the ‘Display’ option and select ‘Font size and style.’
Next, you will see a range of pre-installed fonts to choose from. Tap on the font style you want to select and preview it in the provided display box. Some Android devices also allow you to download additional fonts from their respective stores. After selecting the desired font, your Android device will instantly apply the change, giving your screen a fresh new look.
Using a Third-Party App
Modifying the font in Android using a third-party app allows users to access additional customization options and font libraries beyond the system’s default settings.
These third-party apps provide a range of font styles, from elegant script to bold and modern, giving Android users the ability to personalize their device to suit their preferences. To start, users can explore popular font customization apps such as iFont or HiFont, which offer user-friendly interfaces for a seamless experience. Upon installing the chosen app, users can navigate through the app’s menu to browse and select from a diverse collection of fonts, ensuring that their Android device reflects their unique style and personality.
Using Custom Fonts in Your App
Incorporating custom fonts in your Android app enables developers to customize the text style and enhance the overall visual design of the application’s interface.
This process involves integrating font files into the app’s resources and then applying them to specific UI elements using simple XML attributes or programmatically through code. Designers must also consider factors such as readability, brand consistency, and overall aesthetic appeal when selecting custom fonts.
By utilizing specialized libraries or tools provided by Android Studio, developers can efficiently manage and implement custom fonts to achieve a tailored and visually appealing user interface.
What Are the Best Fonts for Android?
The best fonts for Android encompass a range of typefaces and styles that cater to diverse design preferences and readability considerations across different devices and screen sizes.
These fonts are essential in enhancing the visual appeal and user experience of Android devices. From timeless classics like Roboto and Open Sans to modern, bold choices like Lato and Montserrat, each font brings its unique charm. Their compatibility with various device interfaces ensures seamless integration, whether on smartphones, tablets, or smartwatches.
Whether used for app UI design, website content, or social media graphics, these fonts play a crucial role in creating a cohesive and appealing visual identity for Android users.
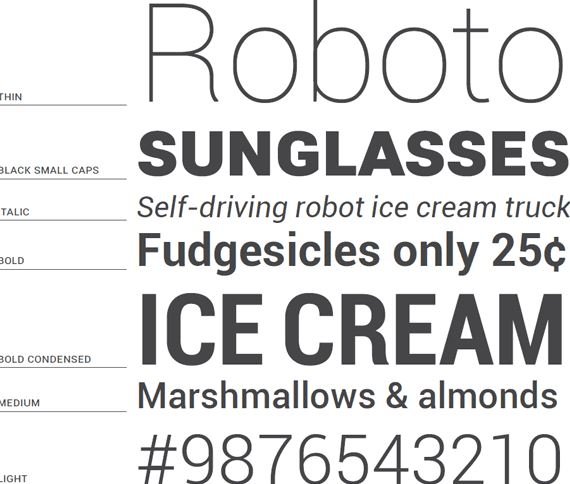
Roboto
Roboto is a popular font choice for Android, known for its modern and versatile design that offers excellent readability and adaptability across different types of devices and screen resolutions.
Its clean and sophisticated appearance makes it suitable for a wide range of applications, from mobile apps to web interfaces. The balanced proportions and refined letterforms contribute to its legibility, especially on high-resolution displays. Roboto’s extensive character set and multiple weights provide flexibility in expressing different levels of information hierarchy and emphasis within the Android design. Whether used for body text or headings, Roboto effortlessly complements the overall aesthetic of the Android interface, resulting in a cohesive and polished user experience.
Lato
Lato is a versatile font option for Android, offering a balanced blend of elegance and readability, making it suitable for a wide range of app interfaces and display settings.
Its clean and modern design gives a polished look to app interfaces, enhancing the overall visual appeal. The flexibility of Lato allows for seamless integration with various design elements, whether it’s for headers, body text, or buttons. Its wide range of weights and styles enables developers to create dynamic and engaging user interfaces, contributing to a cohesive and aesthetically pleasing app experience.
With its potential to convey a sense of sophistication and clarity, Lato is indeed a font choice worth considering for Android applications.
Open Sans
Open Sans stands as a widely favored font choice for Android, renowned for its clarity, legibility, and support for multiple languages, enhancing text presentation across diverse device displays.
This font’s clean and modern design ensures that users can easily read content without straining their eyes, giving a pleasant and seamless browsing experience. Open Sans’ extensive language support guarantees that it can cater to a global audience, making it an ideal choice for apps and websites with an international user base.
Its cross-device compatibility further makes it a versatile option, allowing for consistent text rendering across various screen sizes and resolutions, maintaining readability and aesthetic appeal on different Android devices.
Montserrat
Montserrat offers a contemporary and stylish font option for Android, known for its geometric precision and visual impact, suitable for modern app interfaces and design aesthetics.
It seamlessly integrates into the Android design environment, providing a sleek and sophisticated appearance that enhances the overall user experience. With its clean lines and distinct shapes, Montserrat has the potential to elevate the presentation of headers, body text, and other interface elements, bringing a sense of modernity to the visual language of Android applications.
Its versatility allows for a wide range of applications, from minimalist designs to bold, attention-grabbing UI elements, making it a valuable asset for designers seeking to create visually striking user interfaces in an Android ecosystem.
Noto Sans
Noto Sans serves as a versatile and inclusive font choice for Android, designed to support global languages and diverse text requirements while maintaining a harmonious visual appearance.
Its international appeal lies in its extensive linguistic support, accommodating over 800 languages and various scripts, making it a go-to choice for app developers looking to provide a seamless user experience across different regions and cultures.
The font’s exceptional readability and balanced design make it suitable for a wide range of user interface settings, ensuring clear communication and easy legibility for all users, regardless of their linguistic background.
How to Use Custom Fonts in Your Android App?
Integrating custom fonts in your Android app enables developers to enhance the text style, visual appeal, and brand identity within the application’s user interface.
This can be achieved through various methods, such as importing font files into the project’s resources, utilizing the support library’s Typeface class, or leveraging third-party libraries like Calligraphy.
Once the custom font is integrated, developers can apply it to TextView, EditText, and other text-based UI elements using XML or programmatically in Java code.
When selecting a custom font, it’s essential to consider its legibility, compatibility across different screen sizes, and potential impact on the overall app design.
By carefully evaluating these factors, developers can ensure a seamless and visually appealing integration of custom fonts in their Android apps.
Download the Font Files
The process of using custom fonts in your Android app begins with acquiring the necessary font files from trusted sources or font libraries that align with your app’s design requirements.
These font files, often available in various formats such as TTF or OTF, can be sought from reputable sources like Google Fonts, Adobe Fonts, or custom font creators. When selecting a font, it’s essential to consider its legibility, style, and coherence with your app’s branding. Analyzing the font’s suitability for different text sizes and its readability on various screen resolutions can help ensure a seamless integration. By leveraging these diverse font options, developers can enhance the visual appeal and user experience of their Android applications.
Add the Font Files to Your Project
Incorporating the downloaded font files into your Android project involves file integration, resource management, and assignment of font attributes within the application’s development environment.
Once you have obtained the font files, the first step is to ensure they are placed in the correct directory within your Android project. This typically involves creating a ‘fonts’ directory within the ‘res’ directory in your project structure.
After the files are in place, you need to allocate these fonts as resources in your project. This can be done by modifying the XML resource file to include the font family and style, and then referencing that resource within your layout files or programmatically within your code.
The font attributes, such as style, weight, and variation, can be specified within the XML or programmatically using the Typeface class to customize the appearance of your text in the application.
Set the Font in Your Layouts
Configuring the custom font within your Android app‘s layouts and visual components involves applying font attributes, defining text styles, and ensuring consistent typography across the user interface.
This process requires attention to detail in layout customization to maintain a cohesive visual identity. By integrating custom fonts, developers can enhance the overall user experience, evoking a sense of uniqueness and brand personality. Text styling plays a crucial role in guiding users through the app’s content, making it essential to choose fonts that align with the app’s theme.
Visual consistency considerations ensure that the chosen fonts are compatible with different screen sizes and resolutions, delivering a polished and seamless appearance.
Set the Font in Your Code
Implementing the custom font within your Android app’s codebase entails assigning font attributes, text styling parameters, and dynamic font handling to ensure comprehensive font integration across the application’s functionality.
This involves manipulating the Typeface class to load custom fonts from the asset folder, and then setting the font on TextViews or other text-based views using the setTypeface method. Developers can use SpannableStringBuilder for more advanced text styling, such as applying custom fonts to specific spans of text.
Implementing dynamic font loading involves using the support library’s ResourcesCompat.getFont method to retrieve a Typeface object based on font resource ID, enabling the app to dynamically change the font based on user preferences or other conditions.
Download Apps for Your Smartphone
Google Play Store APK


Comments closed.